
Ever looked at a blank wall and wondered what to do with it? I’ve been there too—staring at empty spaces, feeling like something was missing. That all changed the day I painted my first canvas with just a quote and a splash of color—it turned my living room from “meh” to “wow” overnight. DIY wall art ideas are more than crafts; they’re a way to add personality, save money, and have fun while doing it. In this guide, I’ll share stylish, practical, and totally do it yourself wall art projects that anyone—yes, even total beginners—can try. Ready to roll up your sleeves? Let’s make your walls come alive!
Table of Contents
Why DIY Wall Art is a Game-Changer for Home Decor
DIY wall art ideas aren’t just a fun weekend project—they’re the heart of what makes a space feel like you. When you create something with your own hands, it carries your energy, your story. A blank canvas or empty frame becomes a little piece of home. Whether it’s your favorite quote, a color that lifts your mood, or a pattern that reminds you of your travels, every detail makes the space feel warmer and more personal.
DIY wall art creates an emotional connection by turning your space into a reflection of your personality. And let’s be real—decorating with DIY wall decor is way easier on your wallet than buying expensive art prints. Some of my favorite pieces cost me less than a coffee run. From upcycled frames to thrifted fabric, you can make beautiful things without draining your savings.
DIY wall art is cheaper than store-bought pieces because it uses low-cost or recycled materials. Even better? You get total creative freedom. There are no rules. Want to paint with your fingers? Go for it. Want to mix modern with rustic? Do it. The beauty of do it yourself wall art is that it’s made for you, by you—and no one else will have the exact same piece.
DIY wall art lets you personalize your space in a way that store-bought decor never can. I still remember the before-and-after in my bedroom. It used to feel cold, like a showroom. Then I added three simple DIY canvas pieces—nothing fancy, just soft tones and painted leaves. Suddenly, it felt like mine. Like I could breathe better in that space. Even small DIY changes can completely transform the feeling of a room.
20 Unique DIY Wall Art Ideas Anyone Can Try
Let’s make your walls pop! These easy DIY wall art ideas are fun, cheap, and look amazing. You don’t need to be an artist—just a little time and a big smile.
1–5. Easy Canvas Wall Art Projects
1. Abstract Pour Painting
Just pour, tilt, and let the magic happen.
What it is: Mix colors and pour them on a canvas. Tilt it to spread the paint.
You’ll need:
- Acrylic paint
- Pouring medium
- Canvas
- Cups
Cost: Around $15
Try this: I made one with blues and golds. It looks like a stormy sea!
2. Quote Canvas with Stencils
Let your walls speak your truth.
What it is: Use stencils to paint words on canvas.
You’ll need:
- Canvas
- Paint
- Stencils
- Tape
Cost: $10–15
Why I love it: My “Choose Joy” sign cheers me up every morning.
3. Minimalist Line Art
One line can say a lot.
What it is: Draw faces or shapes with a single line.
You’ll need:
- Canvas or thick paper
- Black marker or paint
Cost: Under $10
Pro tip: Wobbly lines add charm!
4. Ombre Color Block
A soft fade, calm and cool.
What it is: Blend light to dark shades across a canvas.
You’ll need:
- Paint (3–4 shades of one color)
- Canvas
- Brush or sponge
Cost: $12–18
My version: I made a blush-pink one for my bedroom. It’s so peaceful.
5. Tape and Spray Paint Art
Sharp lines, bold color.
What it is: Make shapes with tape, then spray paint over it.
You’ll need:
- Canvas
- Painter’s tape
- Spray paint
Cost: $8–12
Tip: Peel the tape while the paint is still a bit wet for crisp lines.
6–10. Budget-Friendly DIY Wall Decor
6. Printable Art in Thrifted Frames
Fast, easy, and super cheap.
What it is: Print free art online and frame it.
You’ll need:
- Art print files
- Printer
- Old frames
Cost: Around $5
Why it works: I filled a hallway for less than $20. It looked like a gallery.
7. Hanging Fabric Panels
Soft, simple wall charm.
What it is: Hang pretty fabric like a scroll or curtain.
You’ll need:
- Fabric
- Rod or stick
- Hooks or nails
Cost: $10–$20
Tip: Change fabric with the seasons!
8. Paper Flower Wall
Blooms that never fade.
What it is: Make flowers from paper and glue them on the wall.
You’ll need:
- Colored paper
- Glue
- Scissors
Cost: $5–$10
Story: I made these for a party backdrop. Now they’re part of my office wall.
9. Washi Tape Geometric Art
Stick, shape, and done.
What it is: Make cool shapes or lines with washi tape.
You’ll need:
- Washi tape
- Ruler
- Scissors
Cost: $3–$7
My pick: I made a triangle skyline above my desk. No tools needed!
10. Postcard or Photo Gallery Wall
Your best memories on display.
What it is: Use postcards or photos to make a gallery.
You’ll need:
- Postcards or prints
- Clips, tape, or frames
Cost: $5–$25
Why it rocks: My travel wall makes me smile every day.
Pro Tips to Make Your DIY Wall Art Look Professional
Want your DIY art to look store-bought? It’s all in the details. These tips will help your work shine like a pro’s—even if you’re just starting out.
Choose Colors That Fit the Room
Stick to 2–3 main colors that match your space. I once painted a bright red canvas for a calm-toned room. It clashed—badly. Now, I stick to colors already in the room. If your walls are light, go for soft shades. If your room is bold, add a pop of contrast. Use the color wheel—opposites attract and match well!
Match the Size to Your Space
Big walls need big art. Small spaces need small touches. A tiny piece on a big wall can look lost. I made that mistake in my dining room once—it looked like a stamp on a postcard! For large walls, try a set of 3 or one big canvas. For small nooks, even a quote print can do the trick. Art should take up about ⅔ of the wall space it’s on.
Hang It the Right Way
Center your art and use the right tools. Hanging things too high is a common mistake. Your art should sit at eye level—about 57 inches from the floor to the center of the piece. And skip the tape—it falls off. Use wall hooks, command strips, or nails, depending on the weight. Use painter’s tape to mark where you’ll hang before drilling.
What I Wish I Knew Before Starting
Don’t rush—prep makes a big difference. I once spray-painted without covering the floor… guess who had gold tiles for a week? Now I always prepare: I clean the canvas, lay down drop cloths, and test colors on paper first. It saves time, stress, and mess. Keep baby wipes or wet clothes nearby for fast cleanup.
Tools & Materials You’ll Need (Beginner-Friendly)
You don’t need fancy tools to make beautiful DIY wall art. Just a few basics will do! When I started making wall art, I thought I needed a full craft room. Nope! All I had was an old glue gun, some dollar-store paint, and a big roll of tape. And guess what? That was enough to turn my blank walls into magic.
Basic DIY Tools Checklist
Here are the simple tools I reach for again and again:
- Glue gun (my MVP!)
- Scissors
- Tape (both painter’s and double-sided)
- Paintbrushes
- Ruler or measuring tape
- Pencil and eraser
- Canvas or thick paper
- Spray adhesive (great for quick fixes)
With just these few tools, you can try most wall art ideas—even as a total beginner. Keep a small basket or box to store your DIY tools. I call mine the “inspiration kit.” It saves time and keeps the mess low.
Where to Shop on a Budget
You don’t need to break the bank to get started. I usually shop at:
- Dollar stores: Great for frames, tape, and glue.
- Michaels or Hobby Lobby: Best when they’re having sales.
- Amazon: Fast and easy if you know what you need.
- Thrift shops: Hidden gems! I’ve found wood boards, old frames, even fabric scraps.
Dollar stores and thrift shops are goldmines for budget-friendly art supplies. Always check clearance bins and use coupons. I once bought a canvas pack for 70% off—yes, really!
Want a Printable Checklist?
I made a simple DIY Wall Art Starter Kit Checklist to keep you organized. You can print it out or save it on your phone.
Use a checklist so you don’t forget the little things—like tape or brushes!
DIY Wall Art for Every Room
Let’s go room by room—because what works in your office might look weird in your kitchen. I’ve learned (sometimes the hard way!) that the right kind of DIY wall art can totally change a space. Here’s how I add personality, color, and love to every room in my home.
Living Room – Big & Bold Wins Here
Make your wall art the star of the room. This space should make people stop and say, “Wait, you made that?” Think large canvases, gallery walls, or wood signs that pop. In my living room, I made a big abstract painting with blue, white, and gold. It hangs above my couch and always gets compliments—even from friends who thought I couldn’t paint!
Your living room is your stage. It sets the tone. Go for colors you love, and don’t be shy—go big. Group wall art in odd numbers. Three or five pieces look more balanced than two or four.
Bedroom – Calm and Cozy Vibes Only
Your bedroom art should help you relax. Bedrooms are for rest. Pick soft colors and simple designs. I once painted three tiny canvases with pale leaves and hung them above my bed. They cost under $10 and made my room feel like a cozy Airbnb.
Light colors and clean lines help your brain slow down. Avoid loud patterns or neon colors (unless that’s your thing!). Make a quote canvas with your favorite calming words. Mine says, “Breathe. Rest. Repeat.”
Kitchen/Dining – Fun and Food-Themed
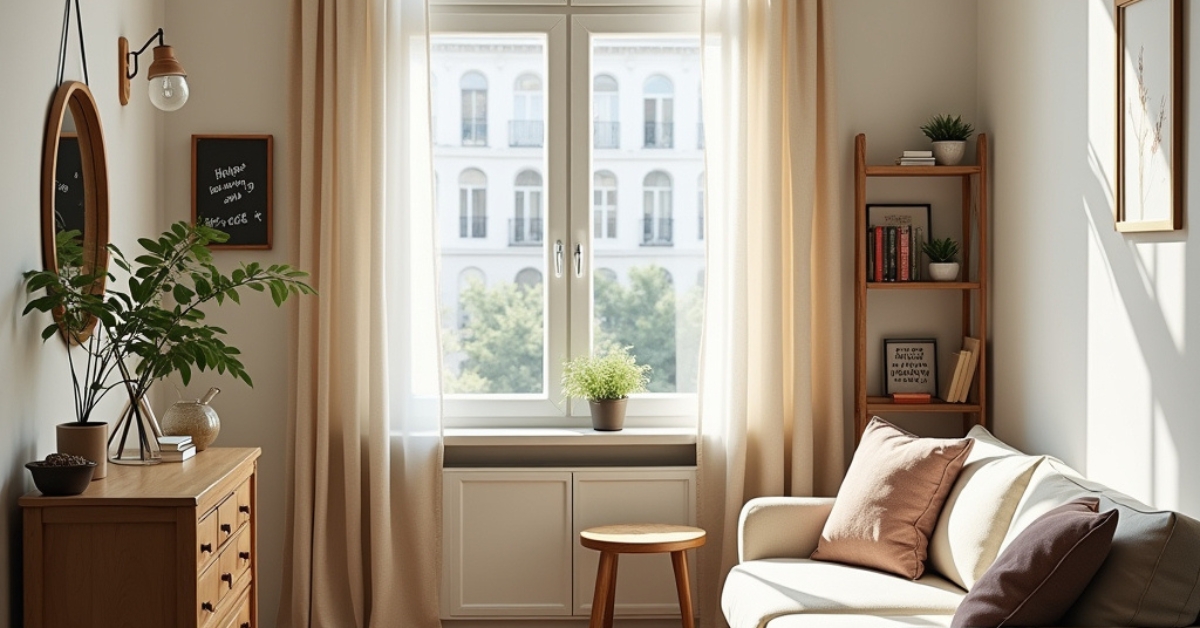
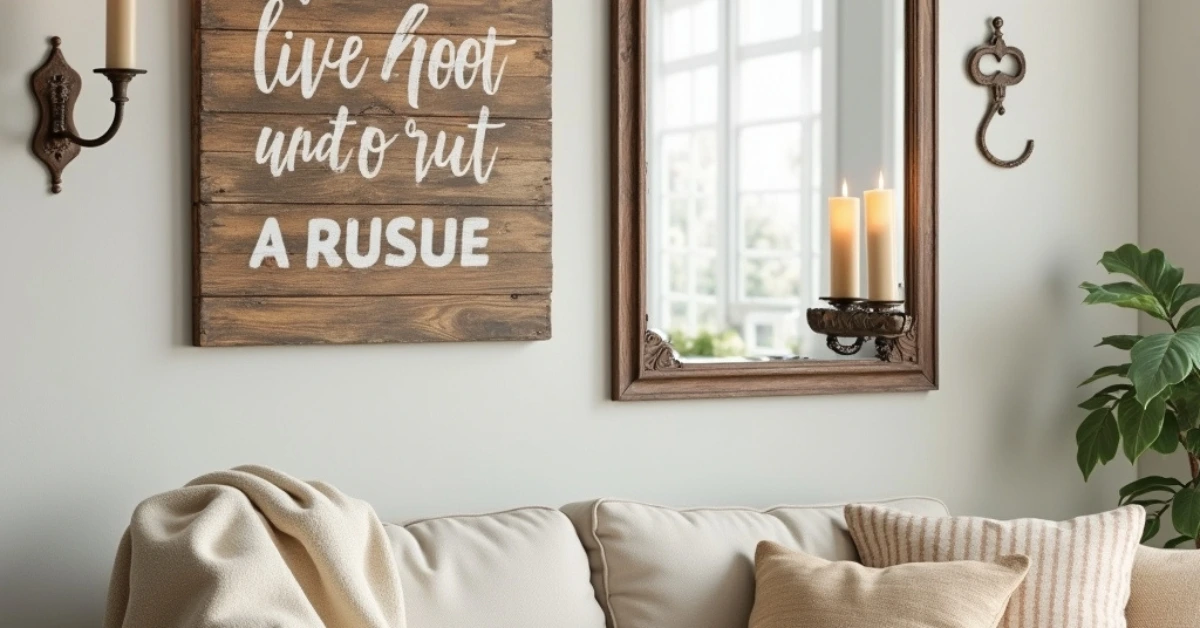
Kitchen art should be useful and fun. The kitchen is busy, but it still needs love. I made a chalkboard menu using an old frame and black paint. Now I write the weekly meals on it—and it saves me from random takeout nights.
The kitchen is warm and full of life. Use food quotes, recipe cards, or vintage food posters to add charm. Print and frame a quote like “Good food, good mood.” Instant smiles!
Office – Art That Boosts Your Mood
Pick art that lifts you up without stealing focus. In my office, I made bold quote prints like “Start. Finish. Repeat.” using Canva and dollar-store frames. It was quick, cheap, and very me.
Words have power. Short, punchy quotes keep your energy up—especially when the coffee runs out. Use calm colors and simple layouts to avoid clutter.
Kids’ Room – Colorful, Safe, and Fun
Let their wild side shine. This is the one room where more is more! I once made rainbow pinwheels from paper with my niece. We stuck them on the wall together—and she added stickers. It was messy and perfect.
Kids need color and play. Try foam boards, washi tape, or paper cutouts. Just keep it safe. Frame their drawings. A crayon self-portrait? Pure gold. DIY wall art isn’t just about saving money. It’s about telling your story—one wall at a time.
My Favorite DIY Wall Art Projects
Some of my best wall art didn’t start out pretty. They began with paint on my hands, late-night ideas, and lots of trial and error. But those are the ones I love most—because they tell my story.
The Bold Blue Abstract Canvas
Bold color can change a whole room. I made this on a rainy Sunday. No plan. Just blue, white, and a bit of gold paint. I used a pour method. I tilted the canvas and let the paint flow. When it dried, it looked like a storm over the sea. I hung it above my couch. My whole room felt deeper and cozier. People kept asking where I bought it!
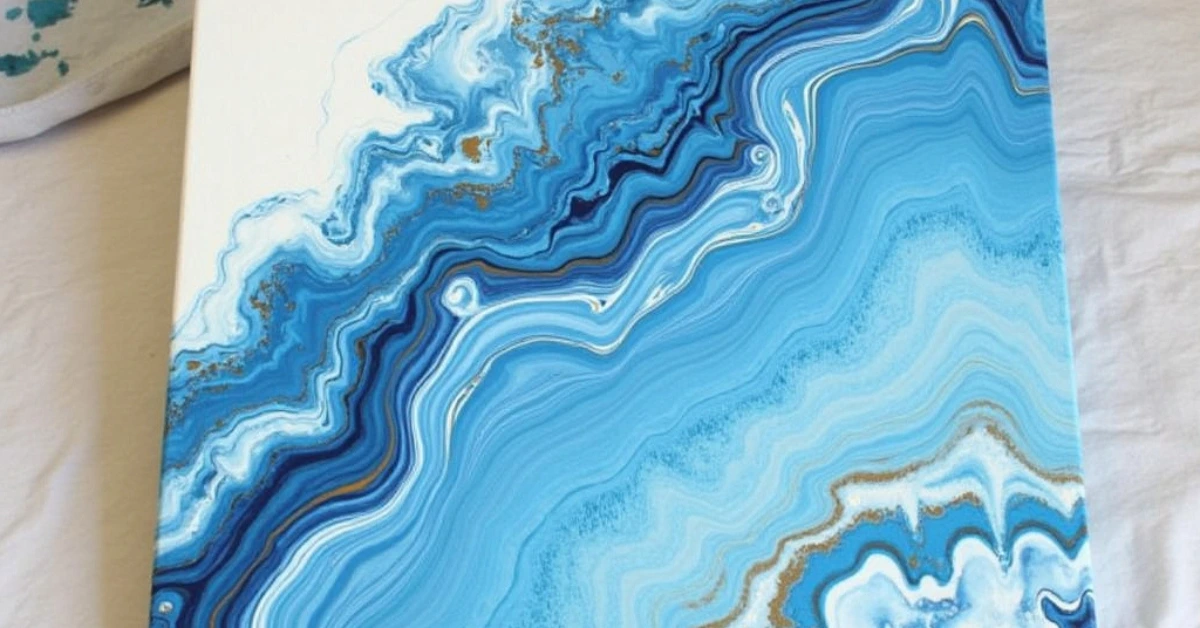
I didn’t seal it. The paint smudged when I moved it. Always use a clear topcoat to protect your work. Pick colors you love. If it’s abstract, there’s no wrong way!
The Quote Canvas That Saved My Morning Mood
A good quote can change your day. I made this during a hard time. I needed a boost. So I painted the words “Choose Joy” in warm yellow. The background was soft white. I used a stencil. Now it hangs above my dresser. I see it every morning—and it makes me smile before my first sip of coffee.
The stencil bled. I used a small brush to clean the edges. It looked great in the end. Dab paint with a sponge, not a brush. It helps stop the bleeding.
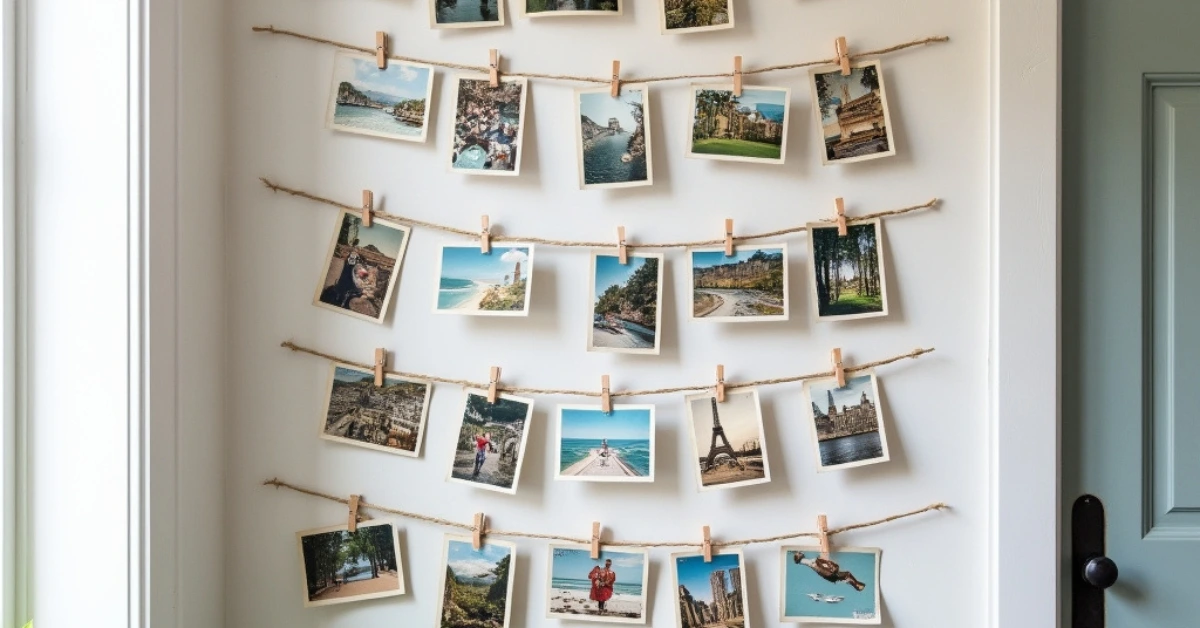
The Travel Wall That Grows With Me
Use photos and postcards to tell your story. I add to this wall after every trip. I use tiny clothespins to hang postcards and prints. They go on a string in my hallway. It’s fun, cheap, and full of memories. Each piece reminds me of a place I’ve been.
I used tape first. It didn’t hold. I switched to Command hooks and twine. Problem solved. Add notes or tickets too. They give the wall more depth and heart.
Want to See Them?
I added photos of all three below. They’re not perfect. That’s what makes them special.
Now It’s Your Turn!
Made something cool? Got a quote, color mix, or a DIY story (fail or win)? Share it! Drop a comment or tag me online. I love seeing your art. And if it turns out messy? That’s okay too—we learn from the mess! DIY art isn’t about being perfect. It’s about having fun and making your space feel like you.
DIY wall art isn’t just about filling blank walls—it’s about filling your space with meaning. It’s fun, budget-friendly, and gives your home that extra you factor. Whether you’re splattering paint on a canvas or clipping postcards from your last trip, you’re telling your story, one piece at a time. And here’s the beautiful thing: you don’t have to be a “creative type” to make something beautiful. You just have to start. Trust your gut, play with colors, make a mess—it’s all part of the magic. Some of my favorite pieces began as total “oops” moments that somehow turned out just right.
Q: DIY Wall Art Ideas Q: What’s the easiest DIY wall art for beginners?
Try printable art in thrifted frames or simple quote canvases.
Q: How do I choose colors for DIY wall art?
Match 2–3 main colors already in your room to keep everything cohesive.
Q: What tools do I really need to start DIY wall art?
Basic tools like paint, brushes, tape, scissors, and a glue gun are more than enough.
So here’s my challenge for you: pick one idea, even a small one, and try it. Maybe it’s that quote canvas you’ve been thinking about. Or the gallery wall with your favorite photos. Whatever it is, I promise—it’ll be worth it.